
By Bryan Martin
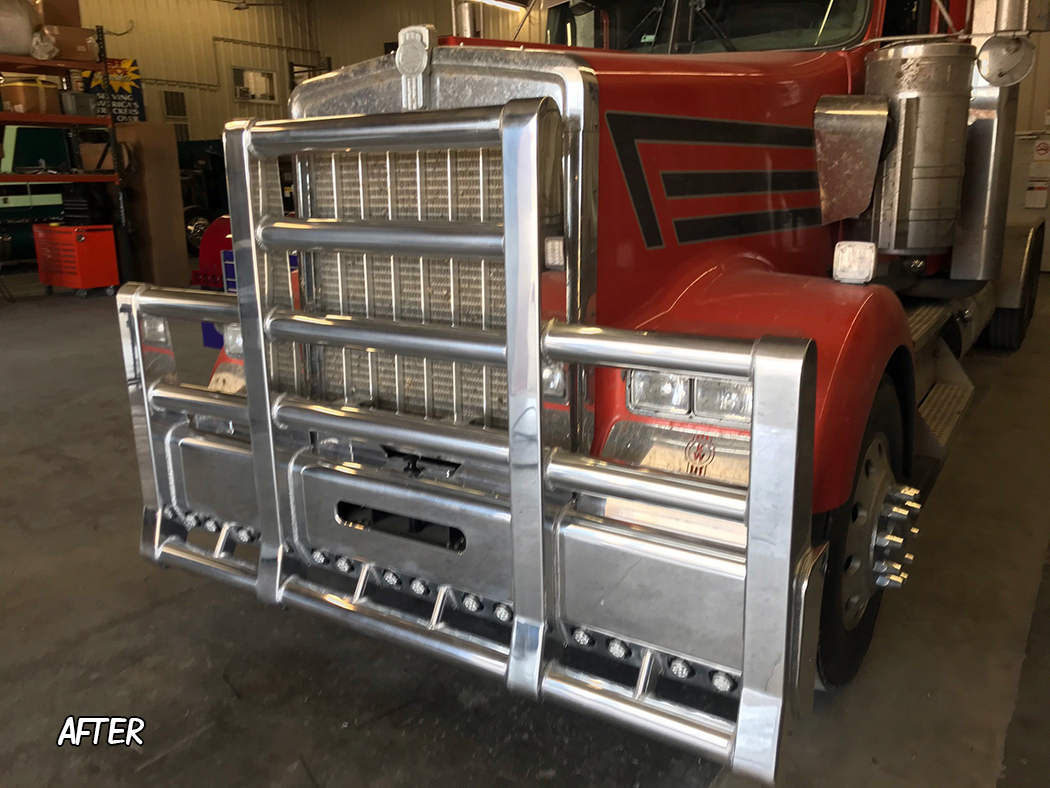
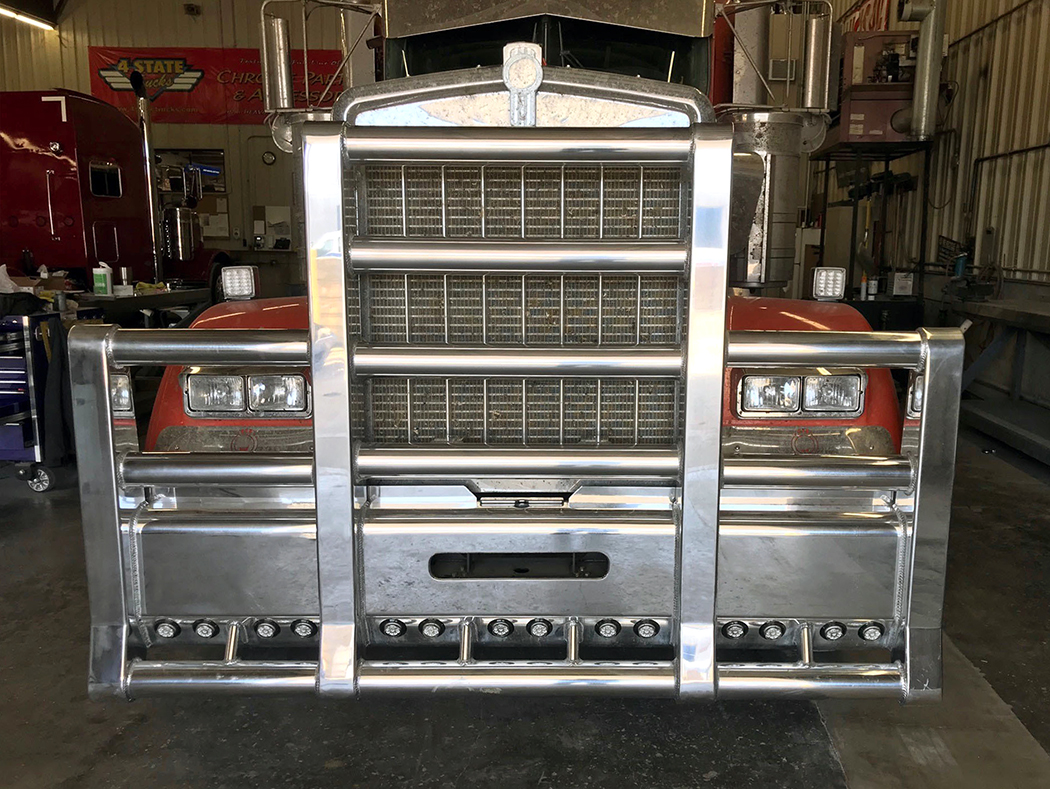
Are you looking for the ultimate protection for the front of your truck? Then a Herd Grille Guard may be just what you need! Herd Grille Guards are available in multiple styles such as Defender, Aero, Texas, Big Tex, Road Train, and Super Road Train. Each bumper style takes it one step further with multiple customization options, pretty much making the possibilities for Herd guards endless. With a few helping hands to do the heavy lifting, you can install these guards within a few short hours and give your truck unsurpassed protection and an impressive look.
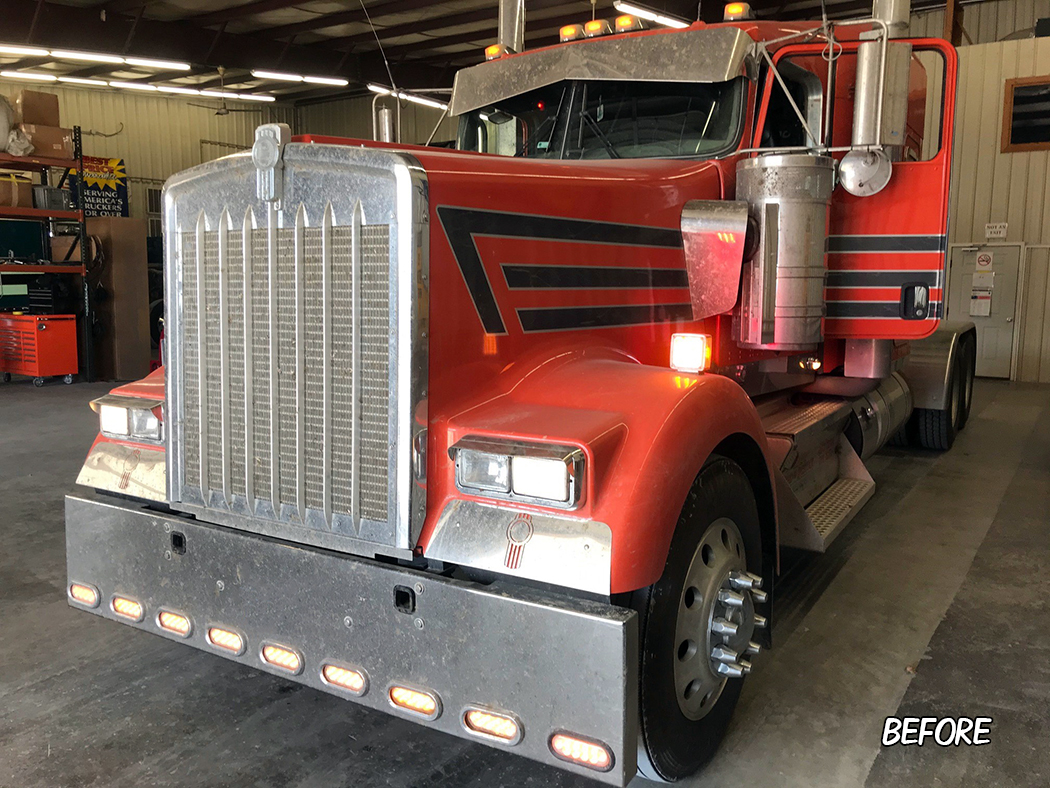
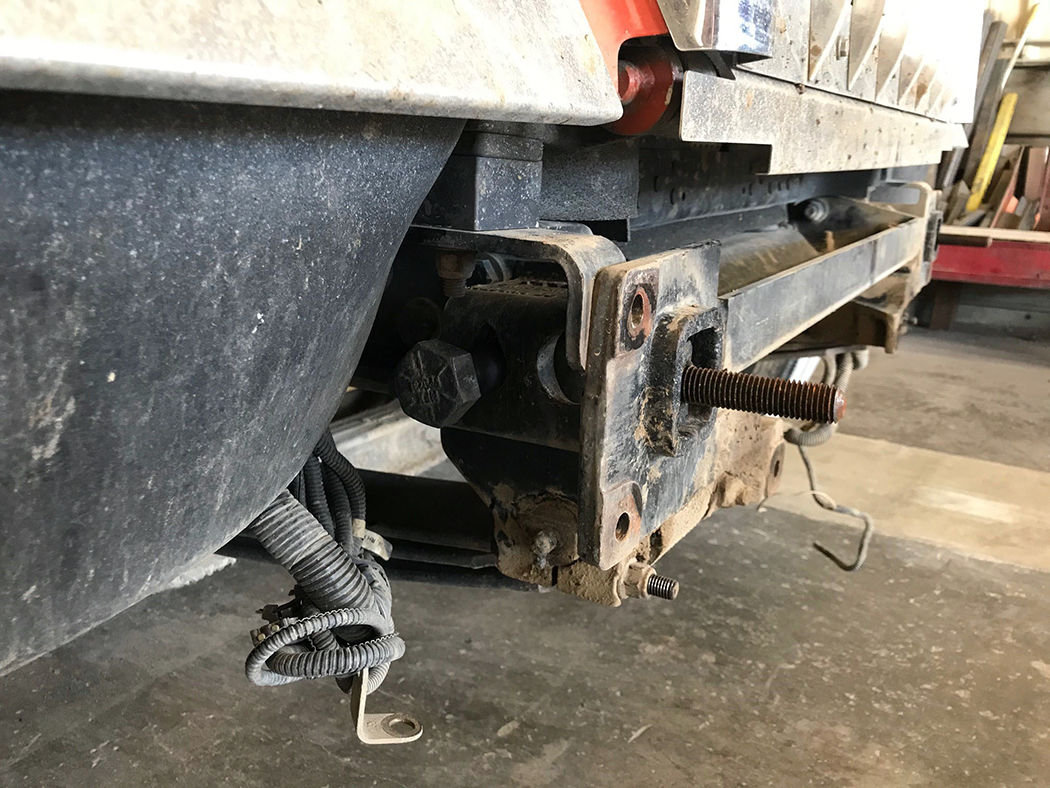
STEP 1: Start by removing the existing bumper, lights, license plate, etc.
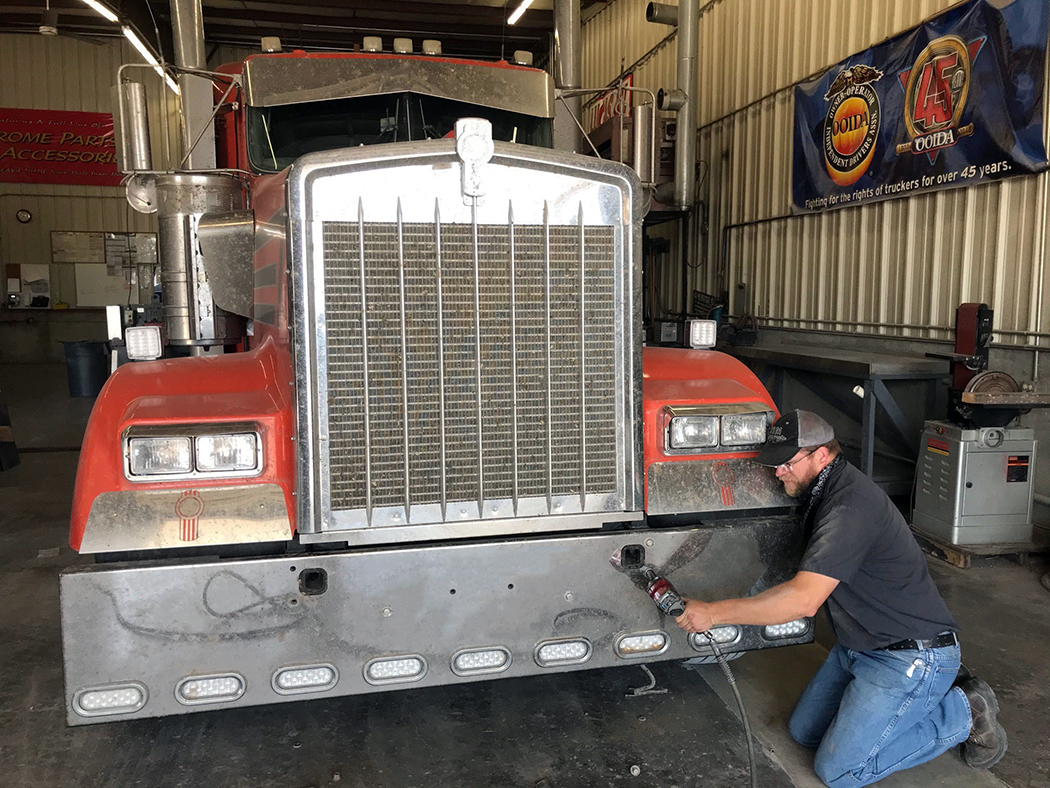
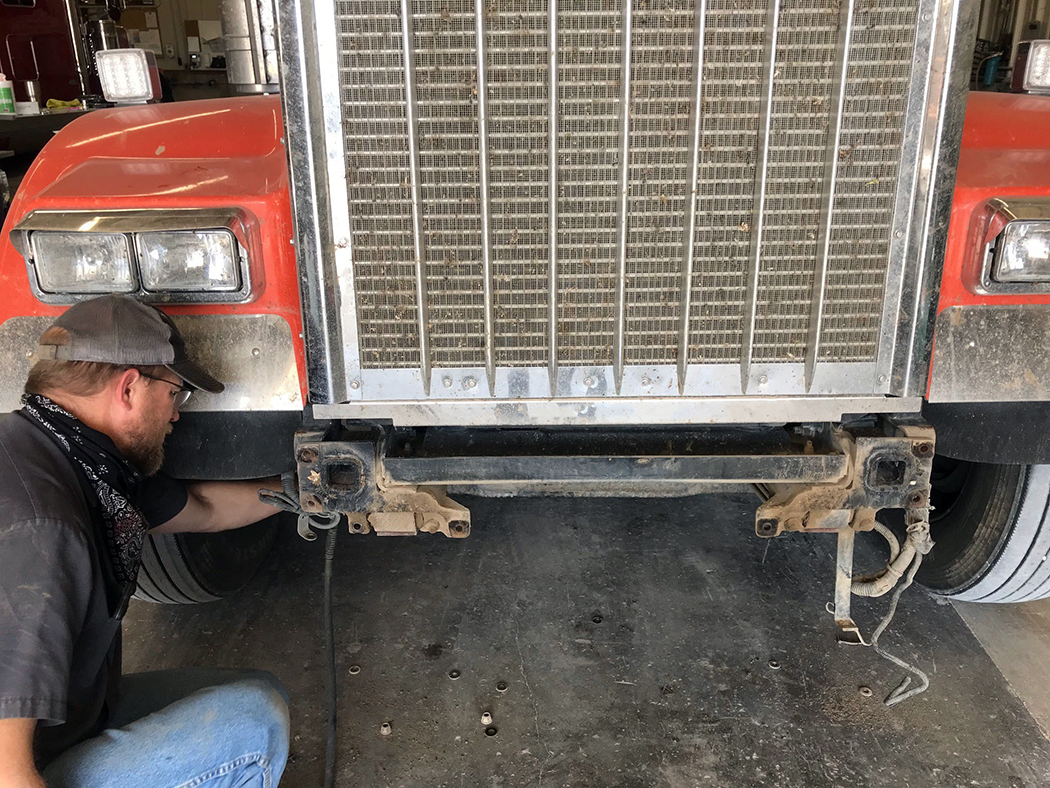
STEP 2: Remove the lower bumper support braces that attach the bottom of bumper to the frame horn on each side. Note: these braces will no longer be used with this grille guard.
STEP 3: This bumper design uses studs that are installed into the truck’s tow pin receiver. Install the studs and tow pin retainers. These will not be tightened until the bumper framework has been attached to the truck frame.
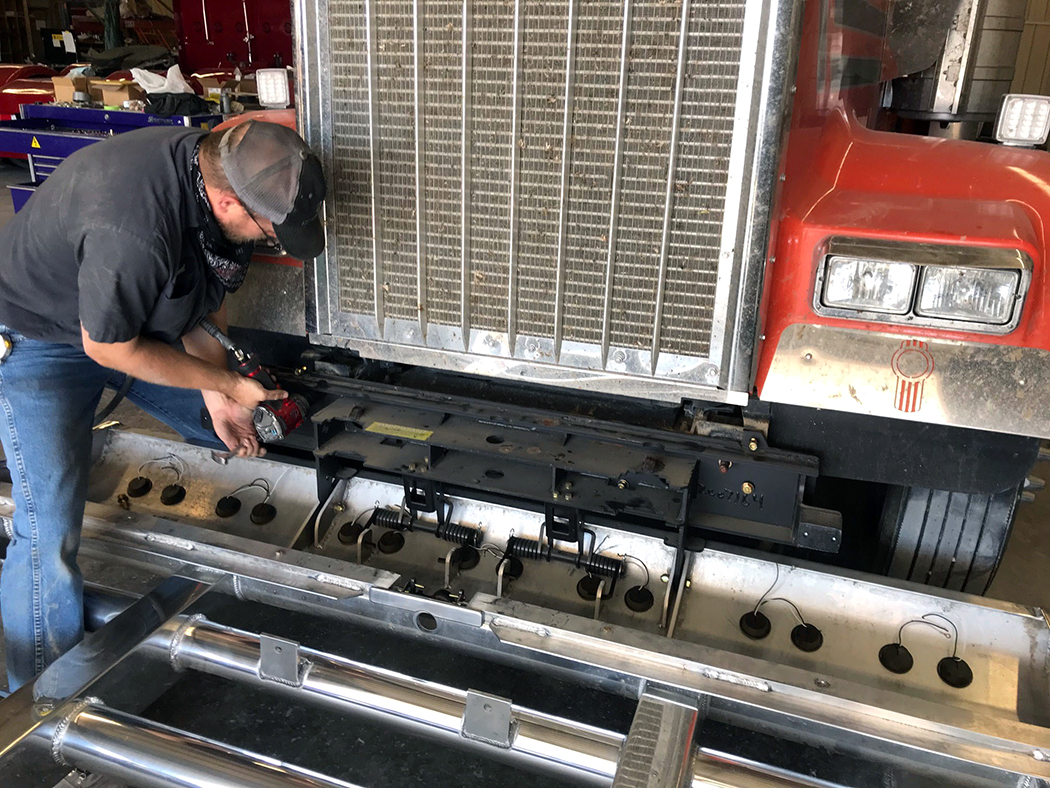
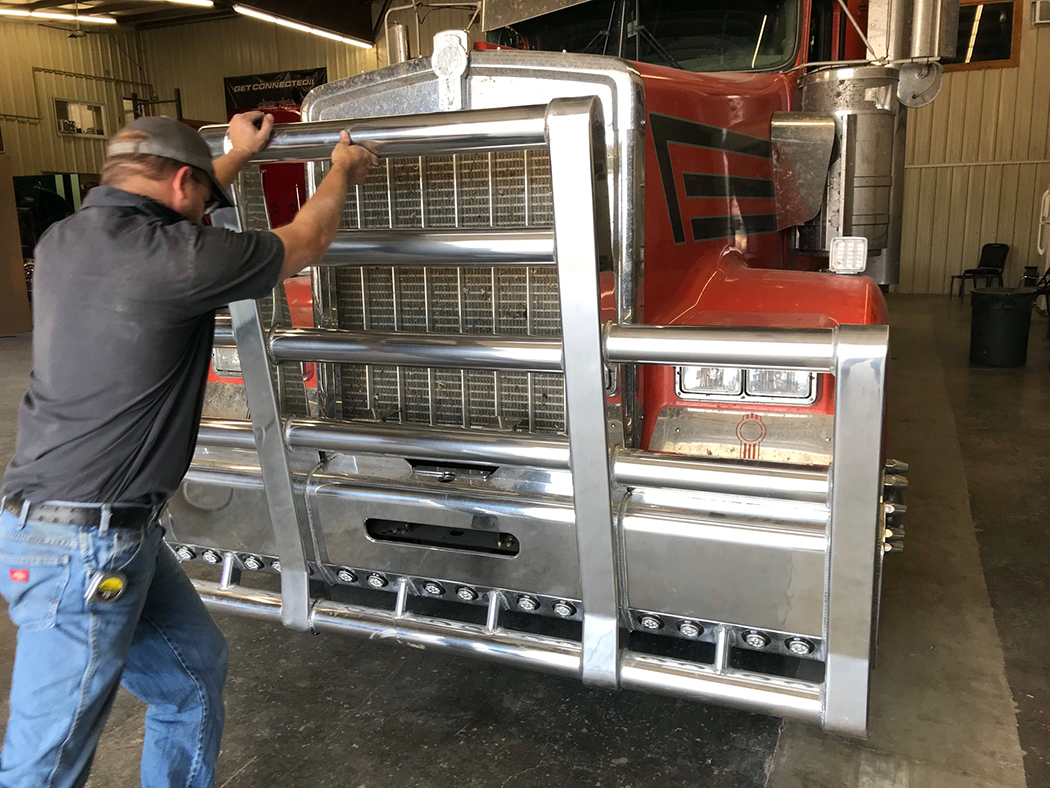
STEP 4: Remove from packaging and leave the bumper attached to the pallet. With a forklift and/or some assistance, pick up the pallet from the front-facing side and position bumper to the truck frame.
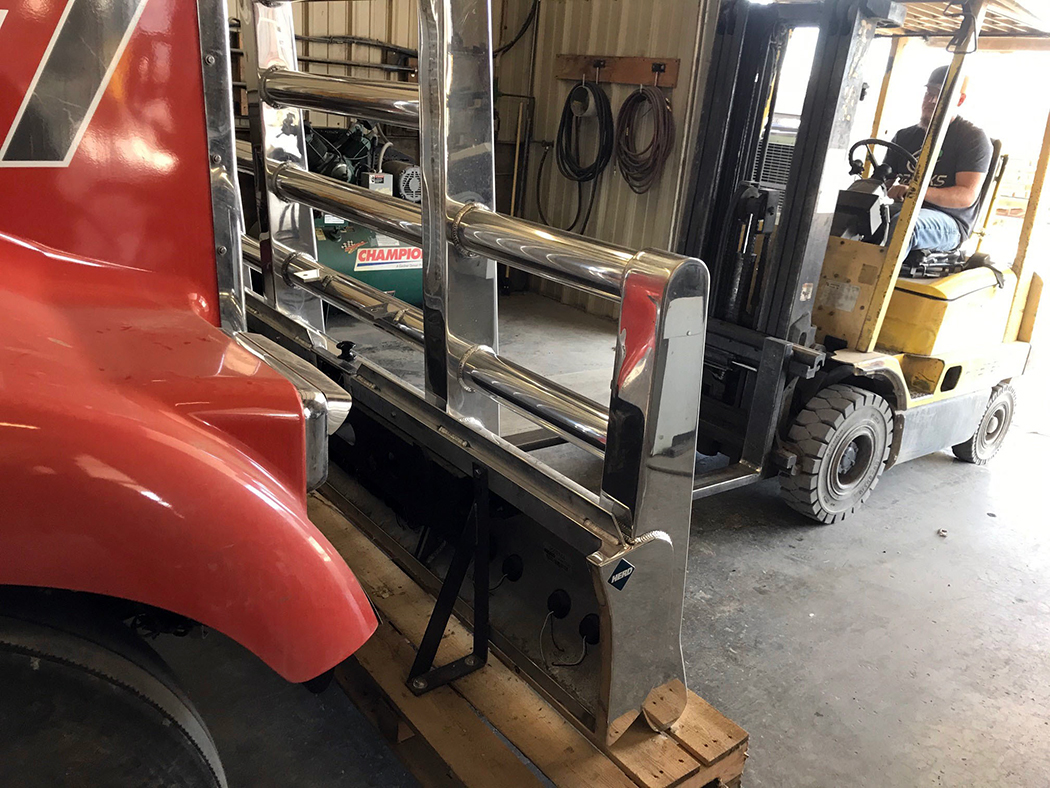
STEP 5: Align the holes on the bumper frame with the studs that just got installed into the tow pin receivers. Once the bumper frame is all the way up against the truck frame, install a bolt and nut into the top hole of each side. This will allow the bumper to hang onto the truck while removing the pallet and bracketry.
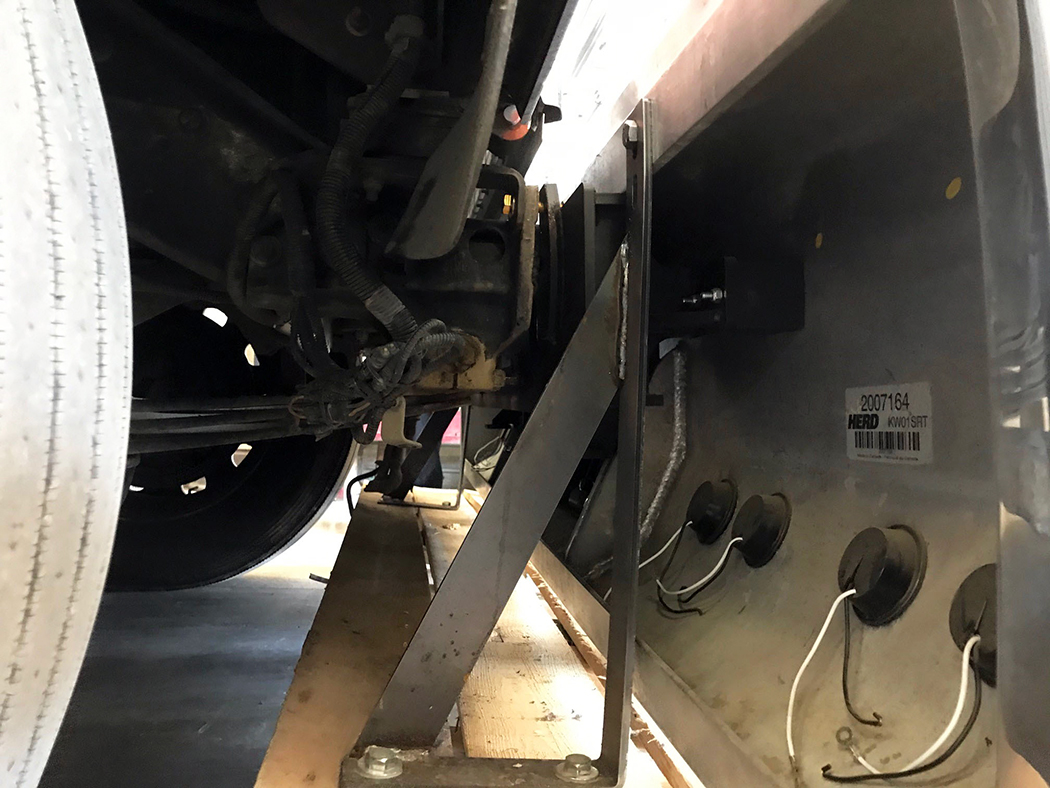
STEP 6: Once the bumper is fully supported on the truck frame, remove the large retainer pin, release the slam-latch, and tilt the bumper open. This will provide access to install the remaining mounting bolts with flat washers and lock nuts. Note: on this model, two bolts had to be inserted from the rear.
STEP 7: After all bolts are installed, use ¾” nuts and lock washers on the studs in the tow pin holes. Tighten all the hardware and check for operation and any interference issues.
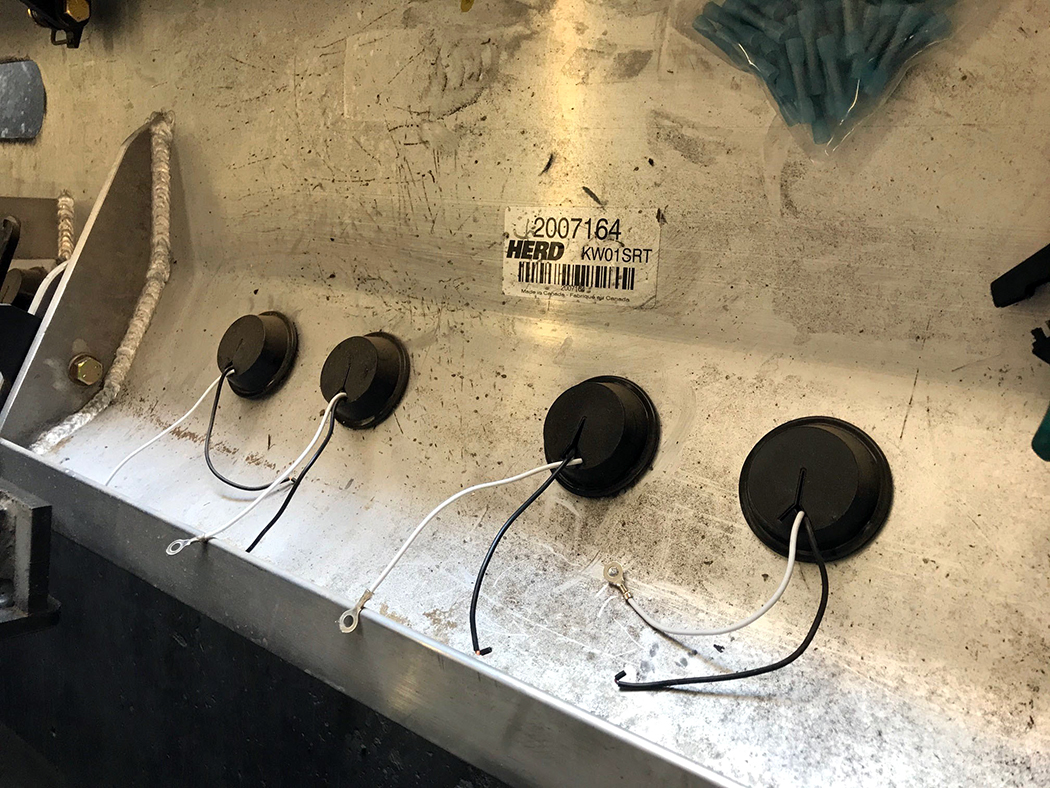
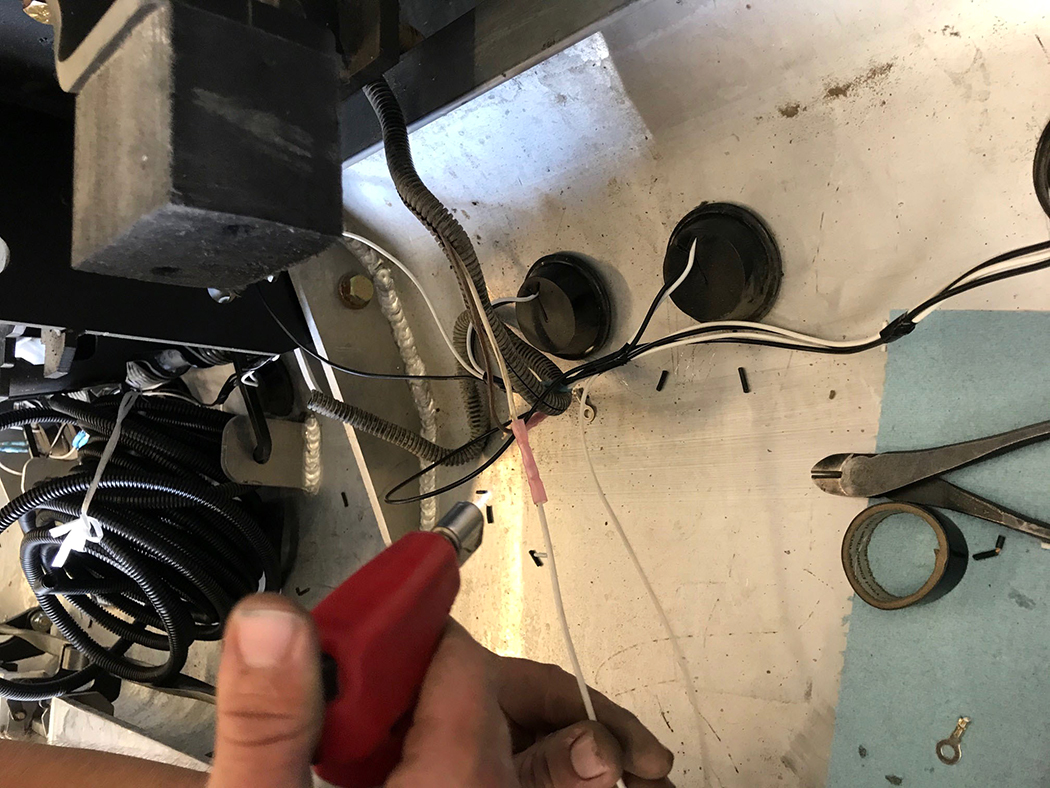
STEP 8: This bumper was equipped with lights and wire pigtails in the bottom of the bumper face. Wire these lights together using suitable wire and linking all the pigtails together. Be sure to route the harness to not get pinched or pulled when the grille guard is being opened or closed. Use heat-shrink butt connectors and 18-gauge wire for these LED lights, complete with split wire loom, and connected to the existing marker light harness from the previous bumper. Using cable ties, tie everything to the brackets or components to ensure they do not get into moving parts.
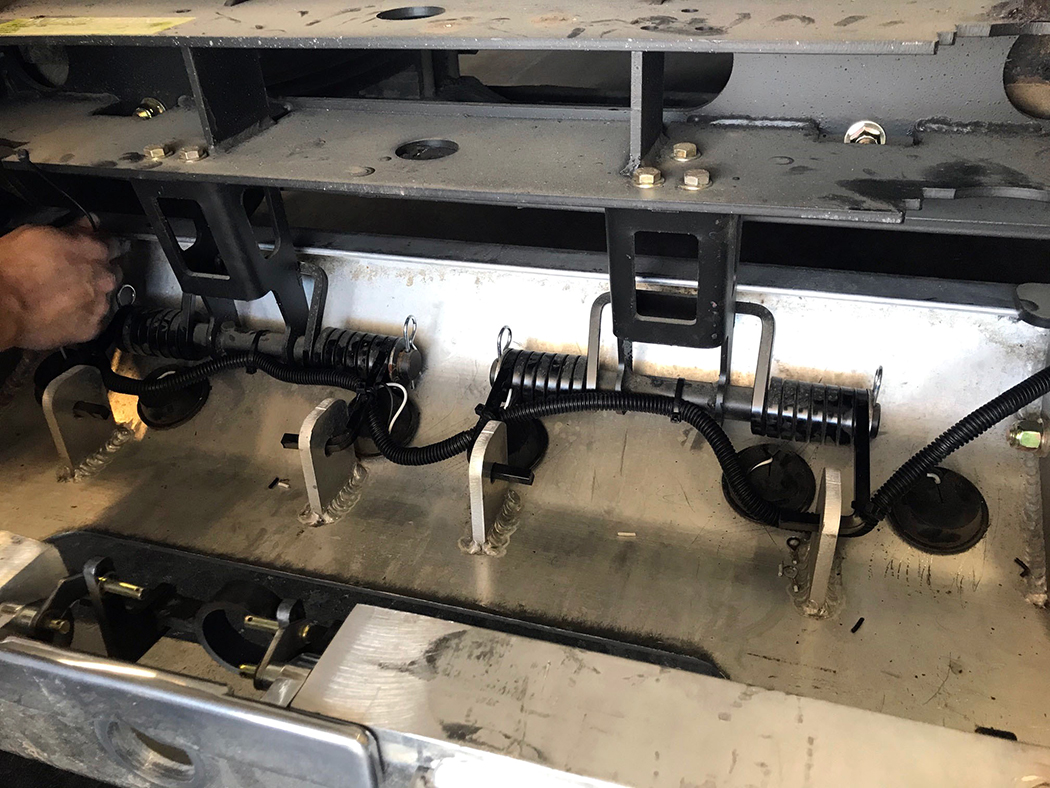
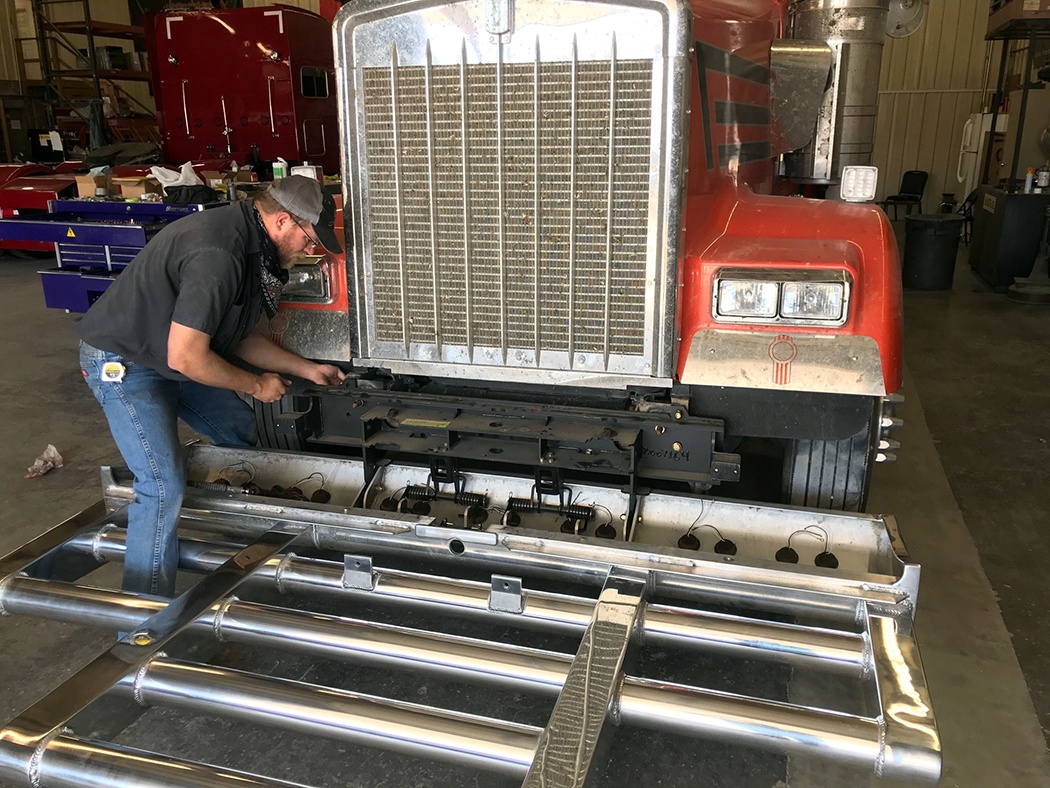
STEP 9: Close the bumper until the slam-latch latches over BOTH detents (bumper should not move or shake) and then drop the large retainer pin back into its hole. Once again, check for any interference or issues with the wire harness and operation of the lights.
FINAL: When mounting the license plate to the face of the bumper, make sure location of the holes does not interfere with any part of the bumper or framework, then drill ¼” holes in desired location. Install plate with nuts and bolts. Clean off any fingerprints or smears with a soft paper towel and glass cleaner.
Check out more Grille Guards for your big rig at www.4statetrucks.com.
Home of the Chrome Shop Mafia!

1 Comment
Your instructions leave out the spacer plate for the KW W900. Calling Herd doesn’t help either.
Just thought someone should know. Especially when there is little instructions for do it yourself people.