


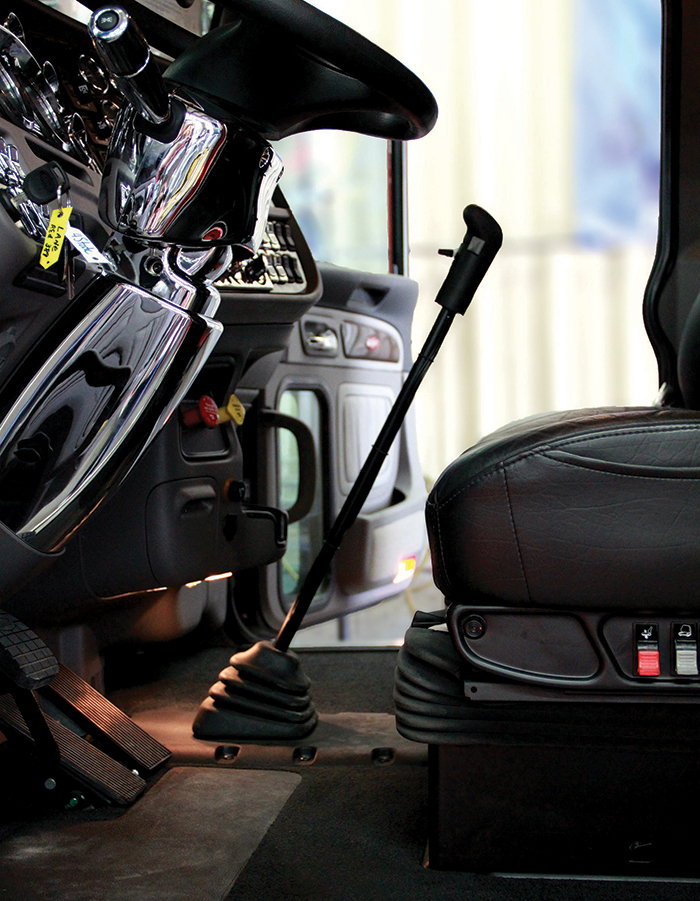
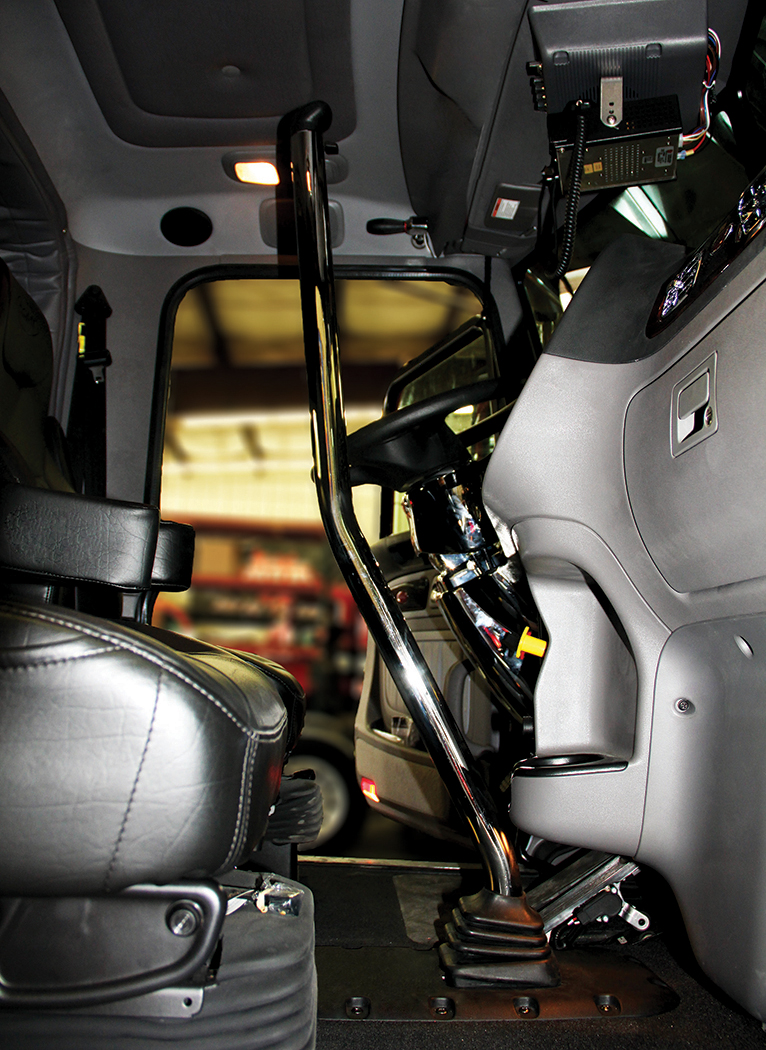
 Tired of your stock shifter and looking to add a totally custom feature to the interior of your rig? This 2” Gorilla Shifter, Bilt By The Boyz at CSM, may be just what you’re looking for. These shifters can be tailored to most any height. The best part is, this shifter can be installed in about an hour and no special tools are required. Check out the steps below and see how easy it is to swap out that old shifter for a CSM Gorilla Shifter that is sure to make heads turn. To inquire, call 888-875-7787 and reach our Fab Shop at extension 143.
STEP 1: Remove the shifter knob sleeve. There should be (2) torx-head screws (one in front and one in the rear) to remove. Then, slide the sleeve down the shaft.
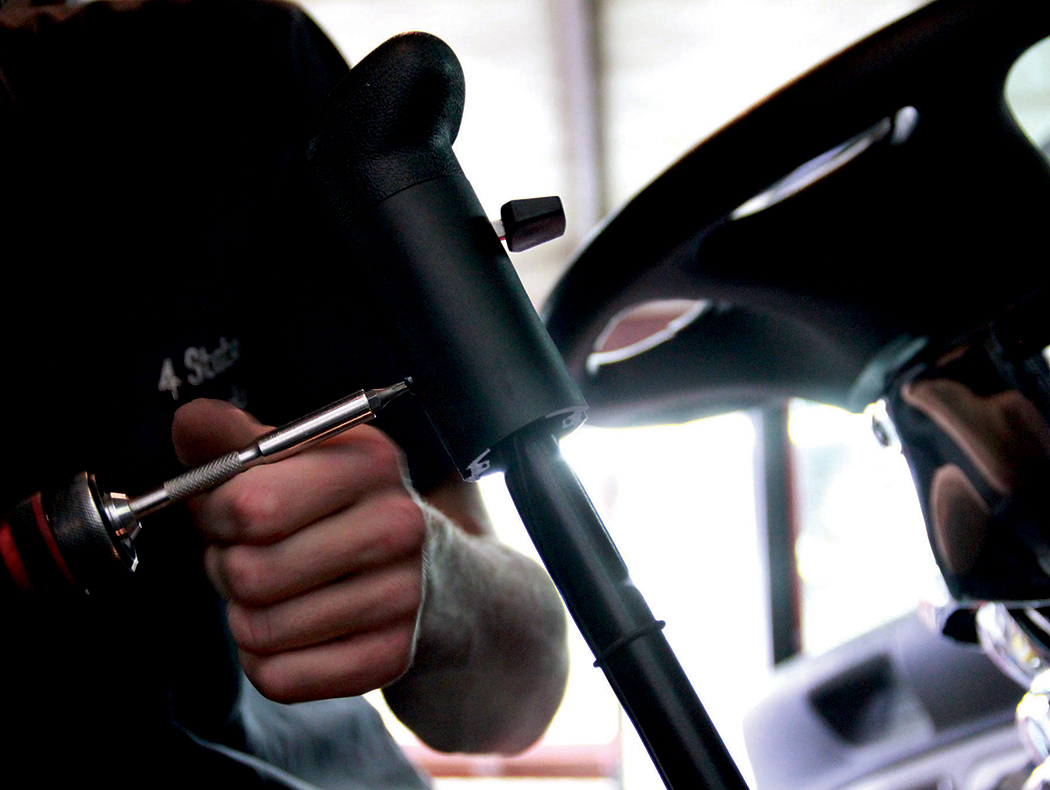
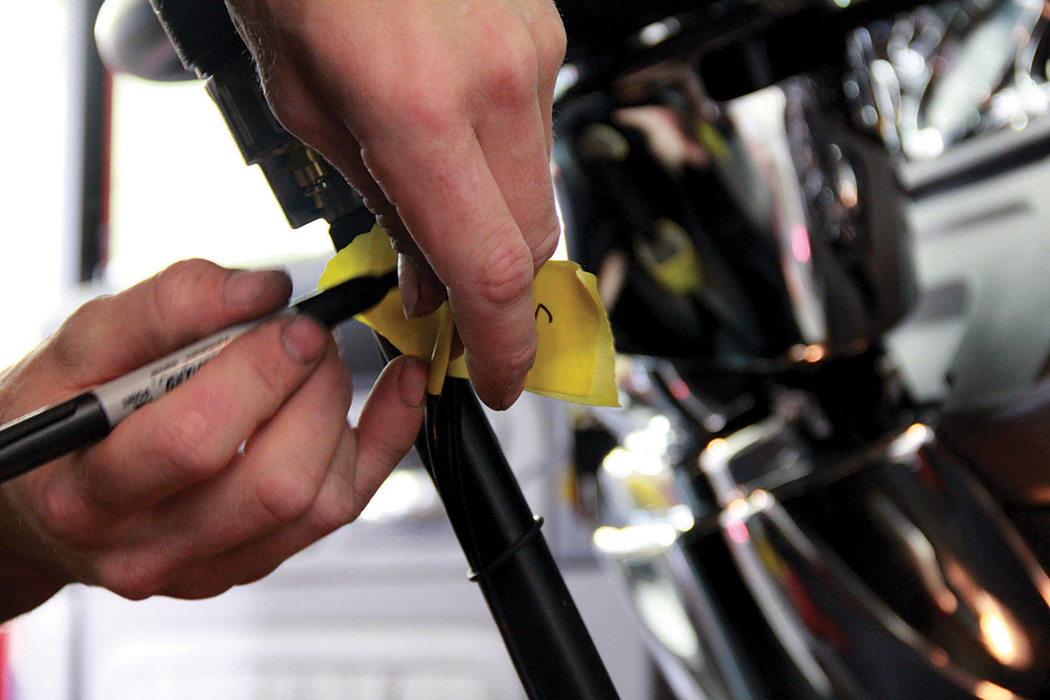
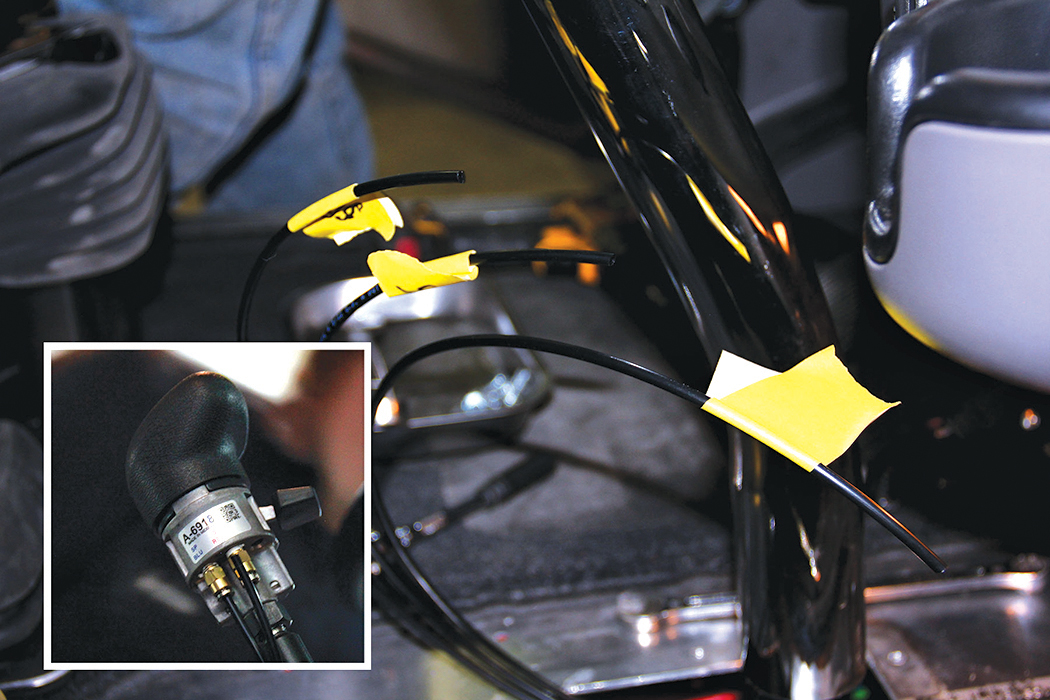
STEP 2: Using masking tape and a permanent marker, label the air lines to match the marking on the shifter – “S”, “SP”, “P” (on an 18-speed). Then, using a 3/4” wrench, loosen the jamb nut under the shifter knob and thread the shifter knob off.
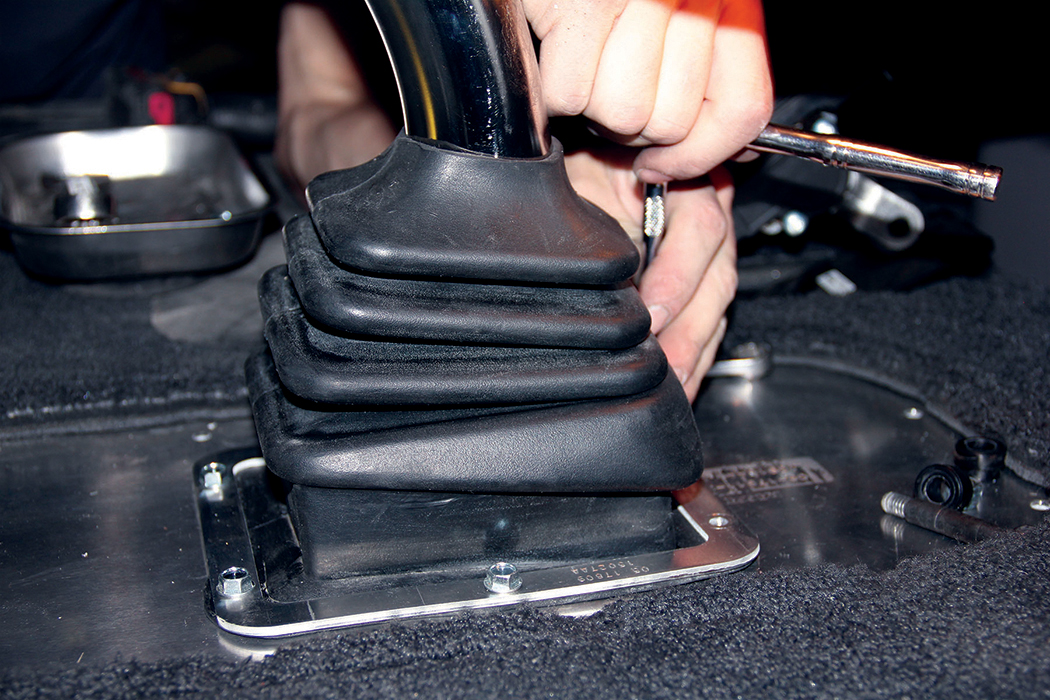
STEP 3: Remove the transmission cover and shifter boot and set aside. This should give access to the top of the transmission for shifter shaft removal.
STEP 4: Remove the bolt or pin that secures the shifter shaft to the top of the transmission. This should require a 1/2” and 9/16” wrench (or “E” clips on older models).

STEP 5: Remove any cable ties or O-rings that secure the air lines to the shaft, then remove the shaft from the top of the transmission. The pin or the isolator could be seized to the top shaft stud on the shift tower – if so, it will require cutting off in pieces.
STEP 6: Apply anti-seize to the stud and install your custom-made gorilla shifter. Insert the new (included) bolt and bushing kit.
STEP 7: Move the shifter through the gears and check for interference with the dash, cupholders, steering wheel, etc.
STEP 8: With the original air lines coiled and secured loosely around the shift tower, add air line unions to the ends. One at a time, insert new air lines (5/32” on most modern models) through the holes on the bottom of the new shifter isolator and push them through the shifter tube. With the unions below the floor and clear of any moving parts, leave 6”-8” of line protruding through the tube for reassembly. Label these lines to the corresponding markings from Step 2.

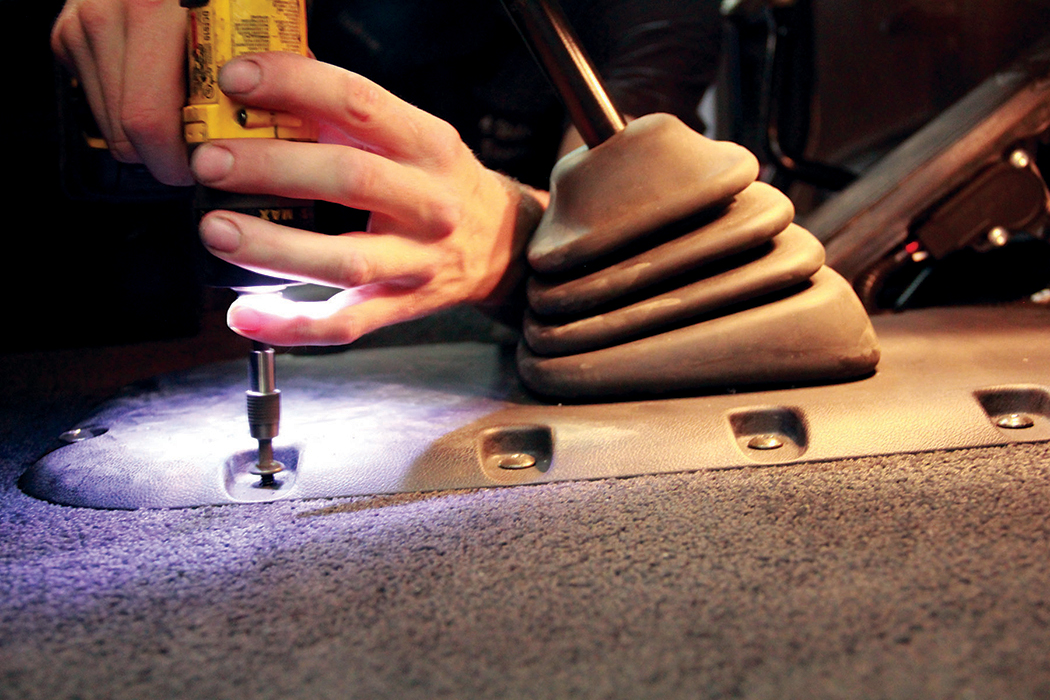
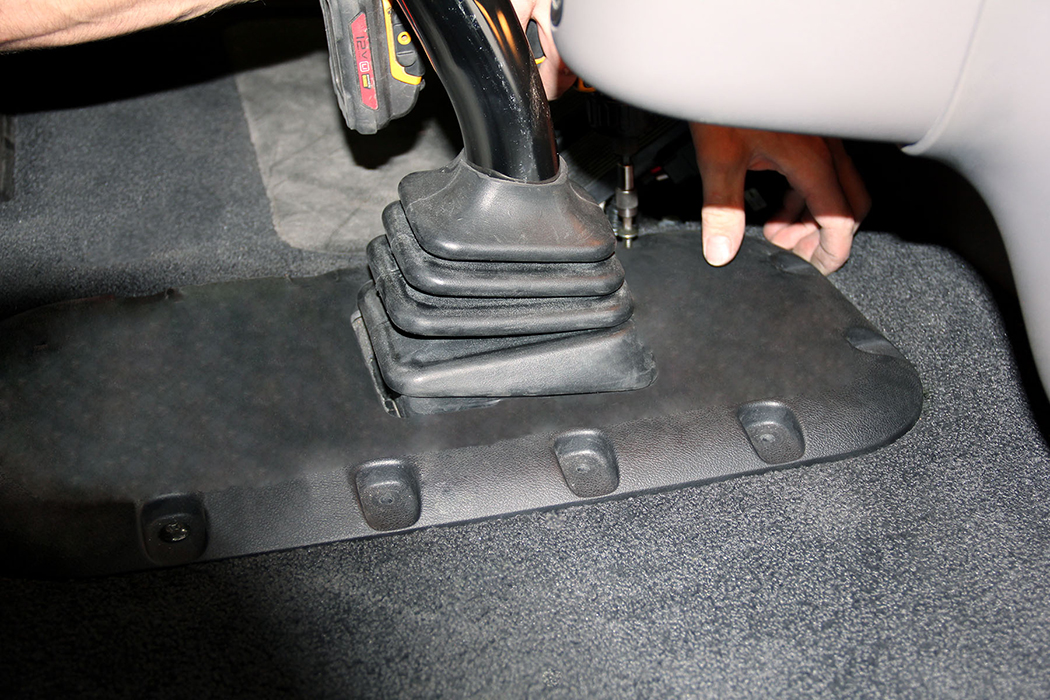
STEP 9: Place the transmission cover back over the shifter. Do not secure back to the floor yet. A new, larger hole will need to be cut in the shifter boot that the 2” tube will fit through. This can be cut with a razor blade, tin snips or a hole saw bit and drill. Now, slide the shifter boot back down over the tube. A little bit of WD-40 or tire dressing sprayed in the boot will help slide the boot into place.
STEP 10: Reconnect the air lines to the shifter knob in their correct location. Once all are connected, insert the knob into the tube. It may be necessary to pull the lines from the bottom of the tube to get slack pulled out at the top. Then, insert the two screws through the two holes on top of the tube into the knob to secure it in place. Test switches on knob for function.
STEP 11: Now, the transmission cover and shifter boot can be secured back to the floor.
FINISH: Installation is now complete! Take it for a test drive and enjoy your cool new shifter!!
Check out more shifters for your rig at www.4statetrucks.com – Home of the Chrome Shop Mafia!