


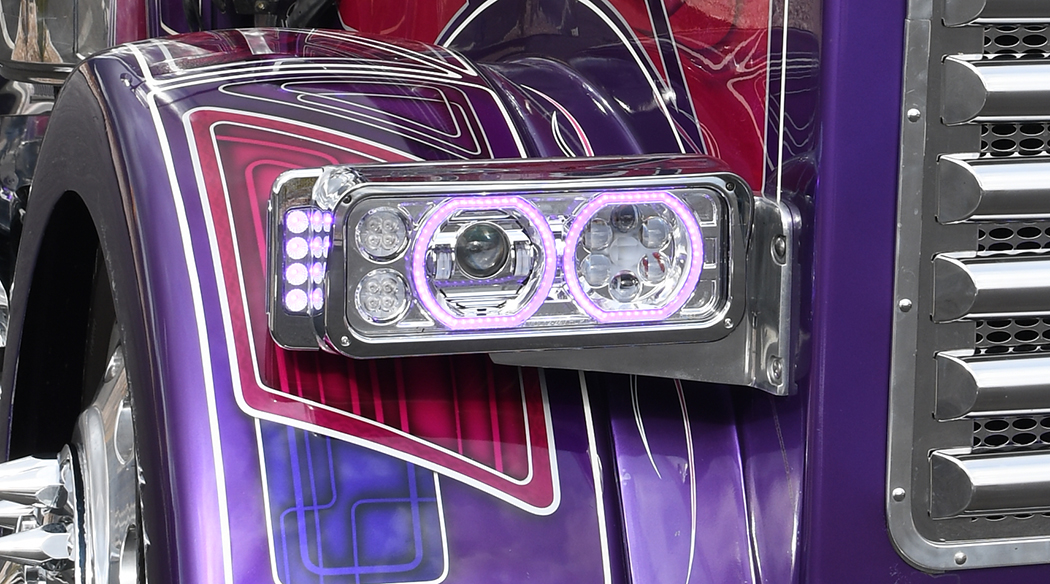
How to install universal dual square LED headlights from Trux and add some style to those traditional sealed-beam headlamps!
STEP 1
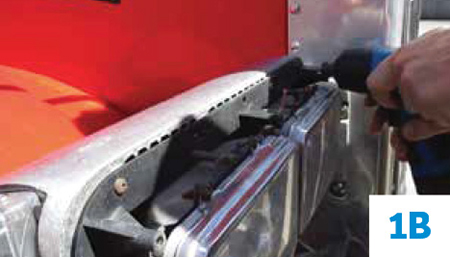
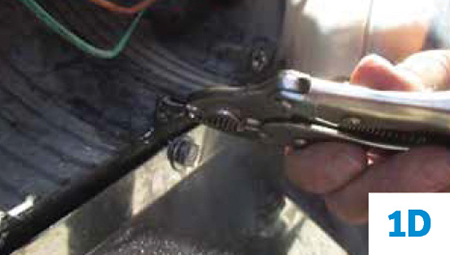
Remove current bezels, headlights and OEM headlight buckets: Unscrew the bezel to access the OEM headlight bucket. Drilling or grinding may be required if bucket is secured by rivets or the screws have become corroded. Remove the OEM bucket then unplug and remove the current headlight wiring from the truck. Note: Non-Peterbilt applications should require you to open the hood and detach the OEM rubber gasket from housing to unplug and remove current headlight wiring.
For Peterbilt applications, see pics 1A through 1D below:
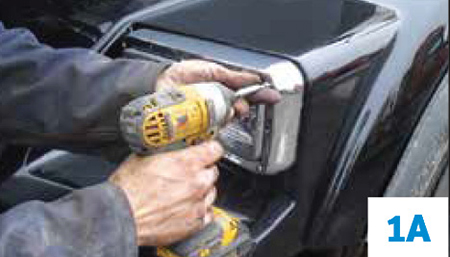
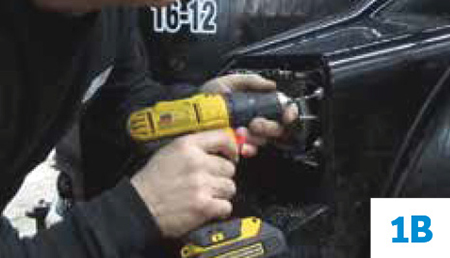
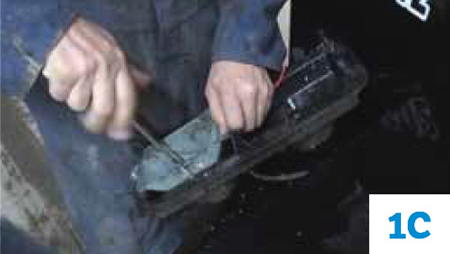
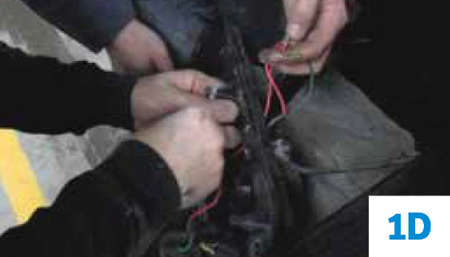
For Kenworth, Freightliner and Western Star applications see pics 1A through 1D below:


STEP 2
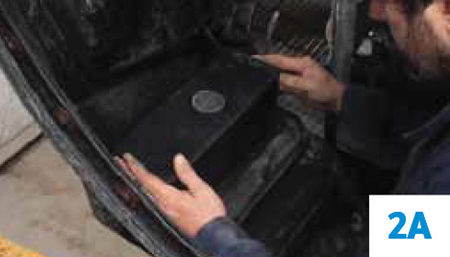
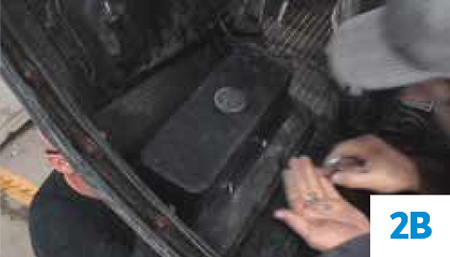
Housing bucket installation and detaching of headlight visor. For a Non-Peterbilt application, open the hood to access the back of the headlight area where the housing bucket will be installed. Position the Trux housing bucket to the four (4) center mounting holes of the hood and tighten the four screws from the front while holding the washer and nut in place with a wrench. Once the housing bucket is mounted, pass the wire harness through the housing bucket. For all applications, unscrew the headlight visor and then set the screws aside. Note: Some hoods may require drilling of mounting holes in order to widen the holes to accommodate the housing screws. See pics 2A through 2D below:

STEP 3
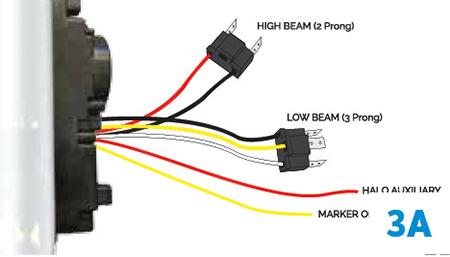
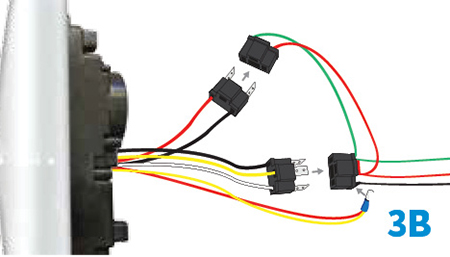
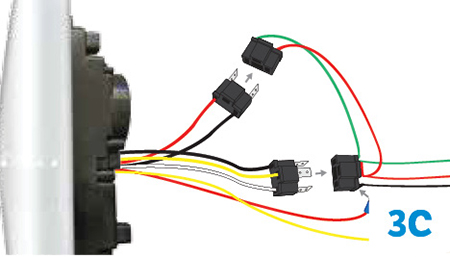
Wiring the headlight assembly. Close the hood and test the wire connections by plugging the Trux headlight assembly connectors into the headlight plugs as shown in the diagrams below (diagram 3A). The clear amber lights can function as a marker or turn signal, but also see below for optional connections. For the marker and halo function with low beam, combine the separate yellow wire (marker function) and red wire (halo function) to the provided male spade (MS) electrical connector. Plug the MS connector into the black wire socket of the 3-wire OEM plug (diagram 3B). For the halo and turn signal function with low beam, daisy-chain the yellow wire to a turn signal light (eg. double face fender light). Attach the MS electrical connector to the red wire (halo function) and connect the MS into the black wire socket of the 3-wire OEM plug (diagram 3C):
STEP 4
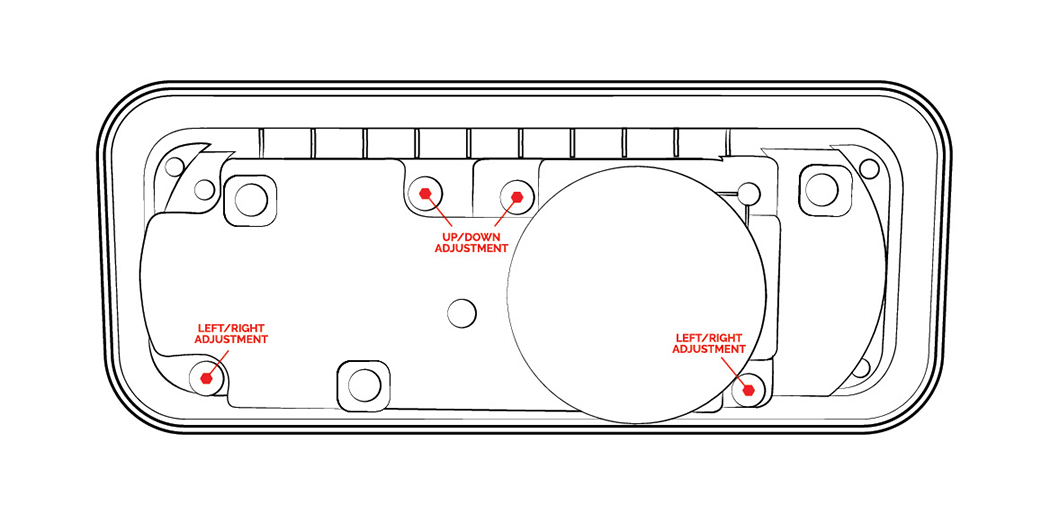
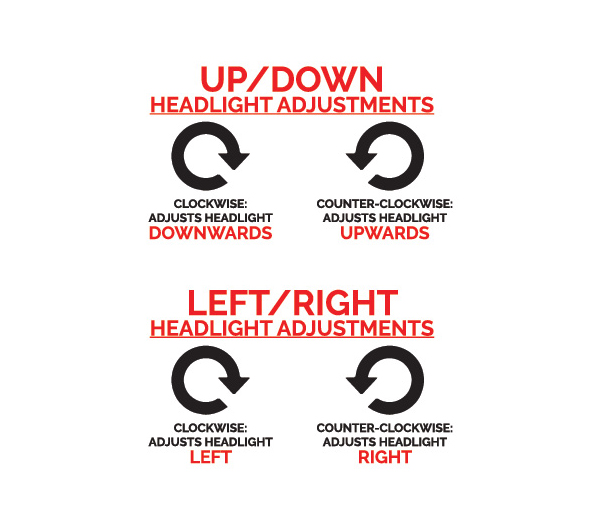
Adjust the headlight beams. The headlight beam can be adjusted with a 4mm socket driver. Adjust the pins clockwise or counter-clockwise at the locations shown in the diagram below:
STEP 5
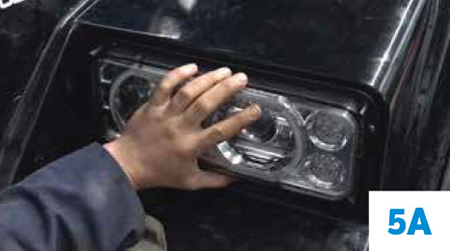
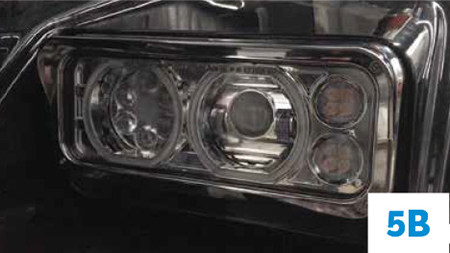
Mount headlight assembly and attach headlight visor. Once you configured the wiring, tested the functions and adjusted the beams, position the Trux headlight assembly to the hood mounting holes (non-Peterbilt applications will need to open the hood to complete this step). Once positioned, screw the new flat screws into the eight (8) screw holes (Peterbilt application) or fasten the four (4) remaining flat screws, washers and nuts to the remaining mounting holes (non-Peterbilt application). Now, align the headlight visor to the front of the newly installed Trux headlight assembly and use the provided screws to tighten the visor in place. Note: For non-Peterbilt applications, close the hood before mounting the visor to the headlight assembly.
For Peterbilt applications, see pics 5A and 5B below:
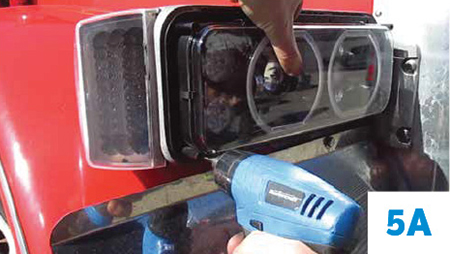
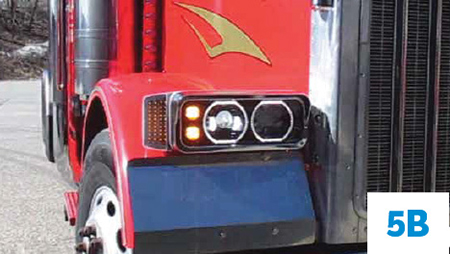
For Kenworth, Freightliner and Western Star applications see pics 5A through 5B below:
 (
(
Now you are not only lookin’ sharp, but your nighttime vision is greatly enhanced as well! ENJOY!
Check out more cool headlights available for your big rig at www.4statetrucks.com – Home of The Chrome Shop Mafia!